The cake-pie paradoxPastry · vanilla crumb · chocolate seam
Julie Clark · August 2015 · eight warm wedges
Chocolate Chip Funny Cake Pie
Julie Clark’s funny cake pie layers a quick vanilla cake over cocoa syrup in an unbaked shell, then lets the oven set the two into one warm chocolate dessert.
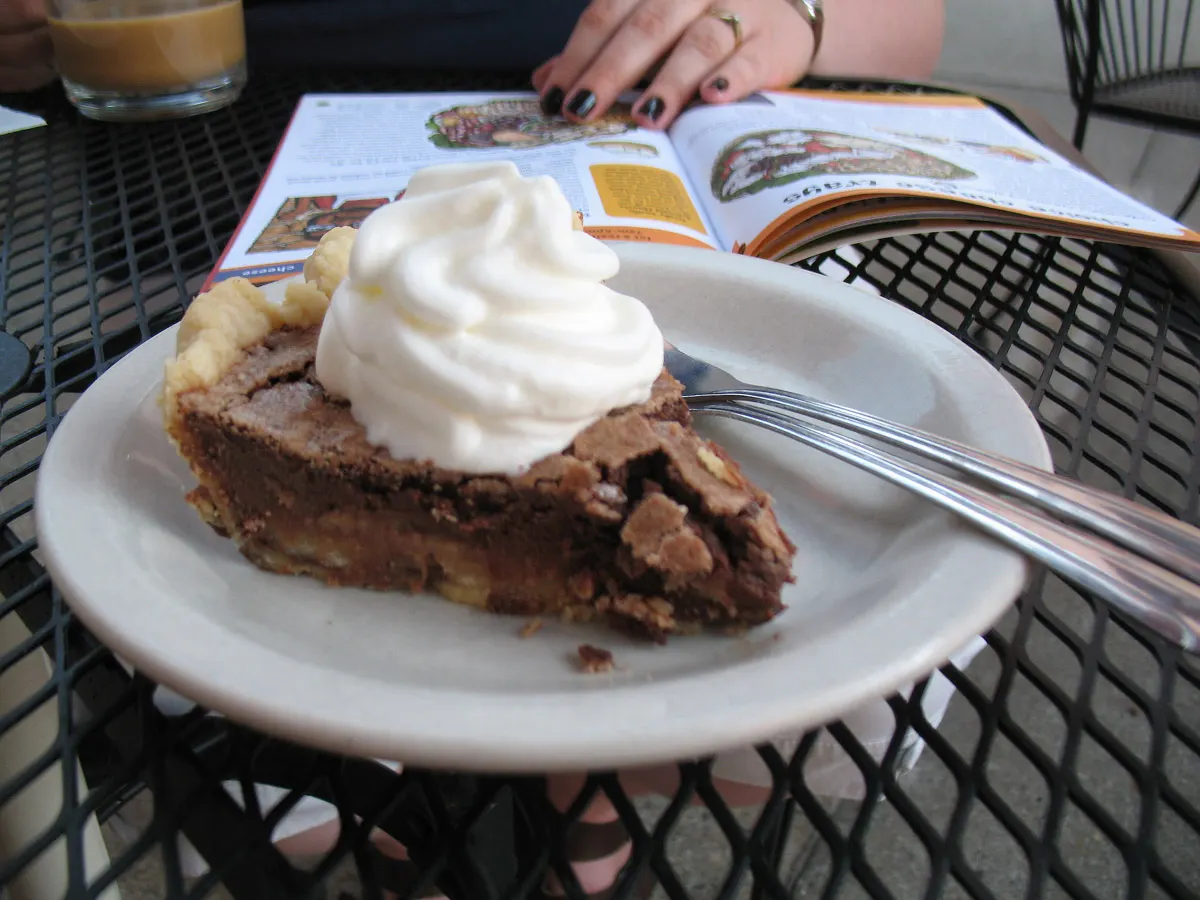
This licensed chocolate chess pie is a visual cousin, not the finished recipe: funny cake pie adds a distinct vanilla cake layer and mini chocolate chips over its fudgy base.Photo by Jamie / Wikimedia Commons · CC BY 2.0
Serves
8
Prep
15 min
Bake
27–30 min
Rest
10 min
The joke is architectural. A raw pie shell receives a thin chocolate mixture that looks too loose to be filling, then a small vanilla cake batter that looks too thick to float. Thirty minutes later they read as one dessert: flaky edge, soft crown, and a dark seam close to the crust.
Julie Clark found the idea in an old Mennonite cookbook and made one practical decision that defines this version: chocolate goes in first. Traditional funny cakes sometimes rely on the oven to reverse the layers, but this one begins with the fudge exactly where the finished slice wants it. Mini chips stay visible above, giving the otherwise pale cake a final, unmistakable map.
“Chocolate fudge is topped with a soft, buttery cake and baked inside a pie shell, with mini chocolate chips scattered over the top.”
Keep butter soft
It should yield to a finger without looking oily. Melted butter changes the cake batter’s structure and weight.
Stop at combined
Alternate flour and milk, then quit mixing as soon as the final pale streak disappears.
Layer, never swirl
Thin cocoa syrup enters first; the thicker vanilla batter is spooned above and eased outward without stirring.
Probe the cake only
A fudgy lower layer is correct. Doneness belongs to the springy crown, not to chocolate on a deep tester.
The layer mapCrust · cake · cocoa · chips
One shell holds two mixtures with opposite jobs
The formula is compact, but it is not a dump cake. Each bowl keeps a different consistency so the finished wedge can be tender above and fudgy below.
01
One unbaked 9-inch pastry
The shell turns a small vanilla cake and loose cocoa syrup into a sliceable pie, catching the chocolate layer at its base.
Fit and crimp, but do not blind bake. Julie’s cake and chocolate go into raw pastry together.02
A soft vanilla cake batter
Butter, egg, milk, and one cup flour make a tender upper layer strong enough to sit over the thinner chocolate mixture.
Use the 130-gram flour weight if possible and stop mixing early; excess flour or agitation makes the crown tough.03
Hot-water cocoa syrup
Sugar, unsweetened cocoa, water, and vanilla form the glossy fudge-adjacent layer that stays close to the crust.
Whisk sugar and cocoa before the water enters so no dry brown pocket survives beneath the cake.04
Mini chocolate chips
Their small scale distributes chocolate across the exposed cake without weighing down one section of the batter.
Scatter only after layering. Folding them into the batter would erase the source’s dotted crown.
Powder + dropThe hidden seam and visible crown
Cocoa disappears below; chocolate chips keep the top legible
Unsweetened cocoa, sugar, hot water, and vanilla become the thin lower mixture; whisking before layering prevents dry cocoa pockets.Photo by thecakeschool / Wikimedia Commons · CC0 1.0
Two chocolates, two textures
Cocoa dissolves into the lower mixture; mini chips remain discrete above. Neither belongs inside the vanilla batter.
Fifteen active minutes build the layers; ten quiet minutes settle them
The source’s 45-minute total reaches the oven door. A short rack rest is the useful final beat: still warm enough for soft fudge, settled enough for a wedge.
0:00
Heat and fit
Bring the oven to 375°F, fit one unbaked pastry into a 9-inch plate, and set it on a rimmed sheet.
+3
Cream the cake base
Beat softened salted butter with sugar, egg, and vanilla until smooth and evenly blended.
+6
Alternate gently
Whisk flour with baking powder, then add it in stages with the milk and stop at combined.
+10
Whisk the chocolate
Combine sugar and cocoa first; hot water and vanilla turn them into a smooth, thin mixture.
+12
Build two layers
Pour chocolate into the shell, spoon cake over it, and ease the top outward without stirring.
+15
Dot the crown
Scatter half a cup of mini chocolate chips evenly and move the sheet pan to the middle rack.
0:42
Begin reading
At 27 minutes, look for a set, springy cake layer and test a pale cake-only patch for wet batter.
0:55
Slice while warm
After a 10-minute rack rest, cut eight wedges while the lower chocolate remains soft.
Heat the oven to 375°F / 190°C with a rack in the middle. Fit the unbaked pastry into a 9-inch pie plate, trim and crimp the edge, then set the plate on a rimmed baking sheet.
For the cake layer, beat the 1/2 cup sugar, softened salted butter, egg, and 1/2 teaspoon vanilla in a medium bowl until smooth and evenly blended.
In a second bowl, whisk the baking powder through the flour until no small white clumps remain. Add the dry mixture to the butter mixture alternately with the milk, beginning and ending with dry ingredients. Mix only until the last flour streak disappears.
For the lower layer, whisk the remaining 1/2 cup sugar with the cocoa powder. Add the hot water and remaining 1/4 teaspoon vanilla, then whisk until the mixture is smooth and no dry cocoa pocket remains.
Pour the chocolate mixture into the unbaked pie shell. Spoon the thicker cake batter evenly over it, then ease the batter outward with the back of the spoon. Do not stir the layers together, and do not worry if a little chocolate remains visible near the edge.
Scatter the mini chocolate chips evenly over the cake batter.
Bake for 27–30 minutes. The cake layer should look set, spring back from a light touch, and give a clean tester or a few moist crumbs when probed in a cake-only area; the chocolate layer beneath is meant to remain fudgy.
Move the pie plate to a wire rack and rest for 10 minutes. Cut into 8 wedges and serve warm, optionally with vanilla ice cream or softly whipped cream.
Source and research references: the queued legacy path and its August 2019 My Recipe Magic capture for legacy ID 2501794692, Lizzy T attribution, March 2018 card date, eight-slice yield, ingredient transcription, and direct original URL; Julie Clark’s maintained Tastes of Lizzy T Funny Cake Pie for the authoritative one-third cup hot water, complete 13-line formula, chocolate-first order, 375°F oven, 27–30-minute bake, warm service, and storage guidance; a digitized 1984 Associated Press Funny Cake Pie for independent historical documentation of the pastry, vanilla cake, cocoa mixture, and clean-tester architecture; King Arthur Baking’s flour-measure guide for loose spoon-and-level volume measuring and cake-doneness guide for the combined tester and spring-back checks. The source proportions, layer order, oven temperature, and bake window remain unchanged; added details clarify bowl order, flour handling, where to test, the short rest, allergens, and honest nutrition omission.