The self-frosting chocolate cookieMix · bake · mint · swirl
Four ingredients · one glossy finish
Andes Mint Cookies
Camille’s four-ingredient Andes Mint Cookies bake in nine minutes, then frost themselves when a crème de menthe candy melts across each warm chocolate top.
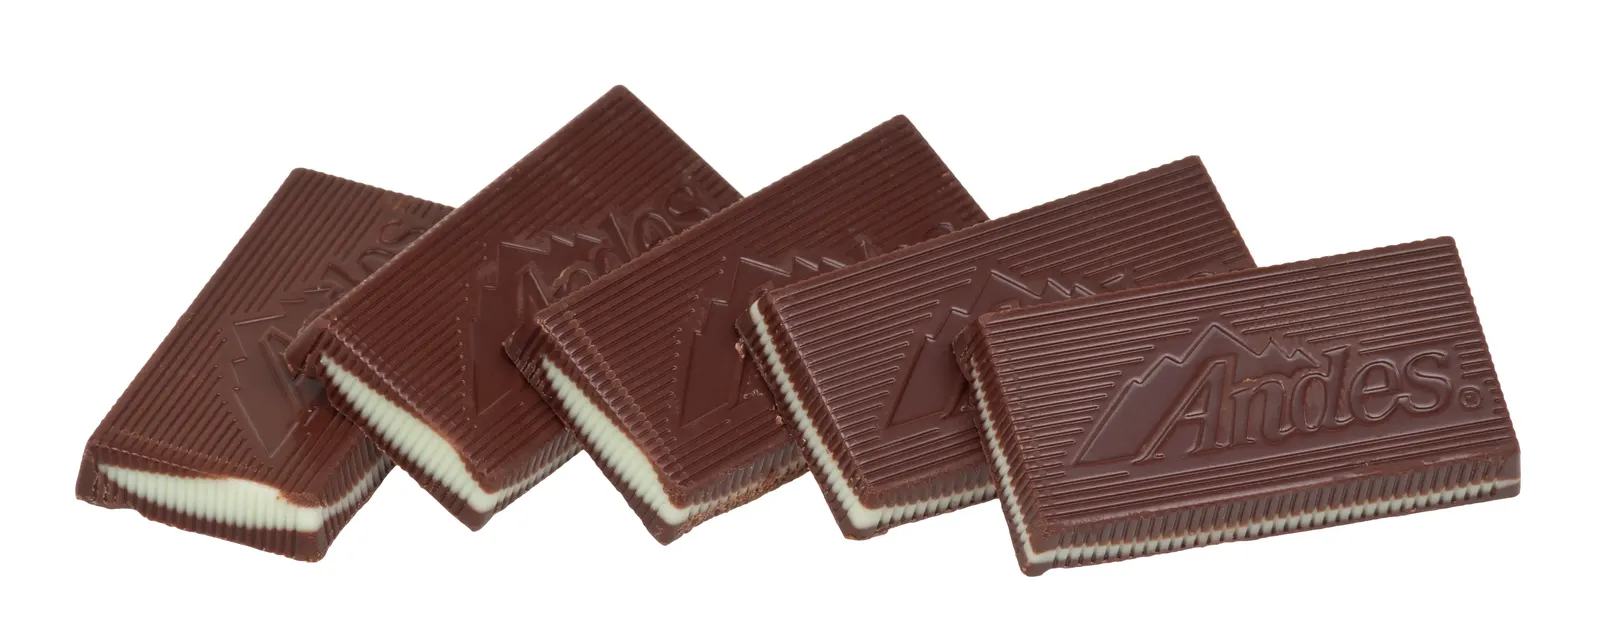
One thin crème de menthe candy becomes the frosting for each warm cookie. The source calls simply for a package; the maintained card portions 30 candies for 30 cookies.Photo by Evan-Amos / Wikimedia Commons · Public domain
Makes
30 cookies
Oven
350°F
Bake
6–9 min
Mint pause
5 min
The frosting is already wrapped. Camille’s cookie starts with Devil’s Food cake mix, oil, and eggs—nothing else in the dough. The fourth ingredient waits beside the oven. As soon as the dark rounds come out, one striped Andes mint lands on each top and softens into a measured chocolate-mint glaze.
That shortcut still asks for timing. Rounded dough balls protect the thick center; the oven stops while that center is soft; the candies must be unwrapped before the sheet returns. Five quiet minutes later, a spoon makes the only decoration required. Warm, the cap is gooey. Cool, it sets into a slim striped shell fit for a cookie tin.
“This is my go-to cookie whenever I need to bring cookies to something or take cookies to a neighbor.”
Stage
Unwrap all 30 mints before the first sheet enters the oven; the topping window begins the moment the cookies emerge.
Round
One-inch dough balls go onto the sheet intact. Camille’s archived answer is emphatic: let the oven flatten them.
Stop
Set outside plus a soft middle is the finish. Waiting for firm centers erases the fudgy texture the source protects.
Melt
The candy needs five untouched minutes on the hot cookie before one brief spoon swirl turns it into frosting.
The four-part mapBase · moisture · bind · glaze
One box, one half-cup, two eggs, thirty mints
There is no hidden flour, extract, or chocolate chip. The current source weight makes the old one-box instruction precise without changing its formula.
01
Devil’s Food cake mix
One 15.25-ounce box supplies the flour, cocoa, sugar, salt, and leavening for a compact dark cookie base.
Use the maintained source weight. A generic “box” is no longer a stable measure after years of package-size changes.02
One-half cup neutral oil
Oil hydrates the dry mix and keeps the short dough pliable without adding another flavor to the mint-chocolate finish.
Vegetable or canola oil fits the source. Measure the full half-cup; do not follow the cake directions printed on the box.03
Two eggs
Egg binds the cake mix into scoopable dough and supplies the structure that lets a soft center finish setting off heat.
Mix only until the last dry pocket disappears, then wash hands and tools after handling the raw dough.04
Thirty Andes mints
Each striped candy is a perfectly portioned glaze: dark chocolate, pale mint center, and top chocolate melt into one thin cap.
Unwrap first, place immediately, wait five minutes, then spread. The order matters more than decorative precision.
The 24-minute laneStage mix round bake place wait spread
The topping window begins at oven out
Most of the clock is forgiving until the cookies leave the oven. Have every candy ready, protect the five-minute melt, and let the sheet do the final setting.
0:00
Heat, line, unwrap
Set the oven to 350°F, prepare two sheets, and free every mint from its wrapper before mixing.
+4
Make one dark dough
Combine cake mix, oil, and eggs only until cohesive, scraping the bowl once for hidden dry mix.
+7
Roll thirty small balls
Portion 1-inch rounds and leave roughly 2 inches between them; do not flatten.
+10
Bake the first sheet
Start looking at 6 minutes and stop by 9, when the outside is set but the center still reads soft.
Oven out
Place one mint immediately
Center a candy on each very hot top before the sheet loses the heat needed to soften it.
+5
Spread the striped glaze
When the mints look glossy, turn each into a thin marbled frosting with the back of a spoon.
+10
Move, set, pack
Let the cookie body firm on the sheet, then cool on a rack until the mint cap can be stacked without smearing.
Dark dough + striped mintThe quick base and its measured finish
Chocolate cake mix builds the cookie; one thin candy finishes it
These open-license double-chocolate cookies are an illustrative texture reference and contain colorful candy pieces. Camille’s darker cake-mix cookies contain no chips; each receives one melted Andes mint on top.Photo by Ruth Hartnup / Wikimedia Commons · CC BY 2.0
Do not bake to a firm center
The outside sets in the oven. The soft middle finishes on the hot sheet while the mint above it loosens into frosting.
The photograph shows a different Devil’s Food batter with visible mix-ins. Camille’s cookie dough is the simpler union of cake mix, oil, and eggs, with the candy reserved for the hot tops.Photo by Andy Melton / Wikimedia Commons · CC BY-SA 2.0
Four finish cuesCohesive · puffed · glossy · firm
Read the dough, shell, gloss, and set
The source gives a short range, not one universal minute. These physical changes keep a fast cake-mix cookie from turning dry or a mint cap from turning messy.
01
Cohesive, thick dough
The mix should hold a rounded scoop with no powder at the bottom. Extra stirring is unnecessary once that point arrives.
02
Puffed with a set shell
The cookie has spread from its ball, the outside no longer looks wet, and the center still yields. That softness is deliberate.
03
Glossy mint after five minutes
The candy keeps its rectangle at first, then shines and gives under the spoon. Spread too early and it drags; too late and it sets.
04
A firm, marbled cap
For packing, the top should lose its wet shine and resist a light fingertip near the edge. Warm service is intentionally gooier.
The cookie-tin planSet seal separate freeze thaw
Cool flat, layer gently, thaw covered
The cookie keeps well once its candy lid is truly firm. Protect that thin surface from warmth, pressure, and condensation.
Best contrast after setting
A completely cool cookie keeps its soft dark center beneath a thin, snappy mint-chocolate lid.
Keep airtight up to one week
Cool first, then separate layers with parchment. Trapped warmth smears the topping and condensation dulls its surface.
Freeze for a longer lead
Use a rigid container with parchment between layers. Thaw while covered so moisture collects away from the candy finish.
Pack only when the cap is firm
For a cookie swap, test one edge before stacking. A warm center can be ready to eat while its chocolate top is still too soft to travel.
Andes Mint Cookies
Camille’s four-ingredient chocolate cake-mix cookies, topped hot from the oven with one Andes mint and spooned into a glossy glaze.
Heat the oven to 350°F / 175°C. Line two baking sheets with parchment paper or silicone baking mats. Unwrap the 30 mints before the cookies go into the oven so every candy is ready for the short hot-top window.
Put the Devil’s Food cake mix, oil, and eggs in a large bowl. Stir or mix on low speed just until no dry pockets remain and the dough is evenly dark and cohesive; scrape the bottom once. Do not taste the raw dough.
Portion the dough into 30 balls about 1 inch wide. Arrange them about 2 inches apart on the prepared sheets. Keep them rounded rather than pressing them flat; Camille’s archived guidance says the balls spread on their own.
Bake one sheet at a time for 6–9 minutes. Begin checking at 6 minutes and stop when the cookies are puffed, the outside looks set rather than wet, and the centers are still soft. Do not wait for a firm center in the oven; the source specifically warns against overbaking.
Remove the sheet from the oven and immediately center one unwrapped Andes mint on every very hot cookie. Leave the cookies undisturbed on the sheet for about 5 minutes, until the candies look glossy and yield easily to the spoon.
Use the back of a teaspoon or a small offset spatula to spread each softened mint over the cookie top in a thin layer. A few strokes will marble the dark chocolate and pale mint layers together.
Let the cookies remain on the baking sheet for another 5 minutes so their soft centers can firm enough to move. Transfer them to a wire rack and cool completely, without stacking, until the mint coating has set.
Serve warm while the topping is gooey, or wait until it firms for packing. Store only fully cooled cookies in a single layer or with parchment between layers.
Source and research references: the exact archived My Recipe Magic card for queued ID 2500534534, the Six Sisters credit, January 10, 2013 import date, legacy 24-cookie field, four ingredients, abbreviated method, original description, and primary-source link; Camille’s April 12, 2011 archived Six Sisters’ Stuff post and author answers for the complete 350°F and 6–9-minute method, overbake warning, immediate mint placement, five-minute melt, spooned frosting, warm/set serving, 30–33-cookie range, 1- to 1.5-inch balls, do-not-flatten instruction, then-current 28-mint package, and freezing confirmation; the maintained Six Sisters’ Stuff card for the current 15.25-ounce mix, 30-cookie and 30-mint standard, 10/9-minute clock, 1-inch shaping, freezer recommendation, and current nutrition estimate; King Arthur Baking’s test-kitchen baking-mix drop cookies for independently tested 2-inch spacing, puffy-soft center cue, five-minute pan rest, one-week airtight storage, and longer freezing; and the FDA’s raw flour and cake-mix safety guidance for no raw-dough tasting, label-directed baking, separation, handwashing, and cleanup. The source formula, oven, bake range, rounded shape, hot-cookie candy placement, five-minute melt, and spoon-spread finish remain unchanged; current package weight, elapsed total, spacing, doneness language, cooling, storage, and safety context are explicitly separated guidance.